So, we continue our "Back to Basics" blog run this week. I want to look at the "taken for granted and normally ignored" Home menu.
Yes, this menu contains so many tools that you probably use all the time, you would be forgiven for not investigating any of the more obscure icons. That is what I am for....
First off I want to go over some of my favourite tools for making your spreadsheets look good (and it's all about looking good, don't you know! ) I have gone over these in detail in a number of my previous blogs, but for a quick recap:
Format Painter
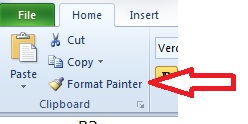 This is a fabulous little brush. Use it to copy the formatting from one cell to other cells. So if you had a group of cells that were formatted exactly as you wanted them, and you wanted to copy that formatting to another group of cells, all you do is highlight the formatted cells, click on the format painter, and then click on the cells you want to format. That's it.
Styles
The Styles Menu lets you easily format your cells to pre-designed formats. You can select from the options available by simply clicking on your preferred style type while you have your cell highlighted. You can also adjust the styles available, so for example make the text in the block "Accent 4" bold and italic, by right clicking on the "Accent 4" block and selecting "Modify".
These styles will apply to all your worksheets within a workbook. A nice way to ensure all your sheets look uniform and smart.
And now for something completely random....
I find this next tool really useful for highlighting specific cells. So, for example, you have filtered a number of rows, and you want to delete the data in your filtered cells, but leave the "hidden" rows untouched. You could delete each cell's data separately. You could trust in the goodness of Excel that if you just highlight all the cells and press delete it won't delete the underlying cells. (Sadly, this has happened to me once too often, and the trust has gone, so I am always extra cautious).
Or, you could just use the "Go To Special" tool, which you find here, right at the end of the home menu...
Click on this, and you get a table of various options you can select. For our example, you would use "Visible Cells only".
If you just wanted to select all the blank cells in a selection, you select (funnily enough) "Blanks" and so it goes on....
This is just a handy little tool for finding specific types of cells, and one that I have discovered not so many people are aware of.
So those are my random helpful icons for today. Again, if you have any questions, please feel free to add a comment or get in touch with this link.
Thanks for reading, and happy spreadsheeting!
Hi and welcome back.
I know I have been a bit quiet on the blog front recently, but that is just because all my other fronts were demanding my attention! But I missed keeping in touch, so I am back with a new series of Excel blogs. They are going to follow my father's rule of keeping everything "Short, sweet and to the point".
So these missives will be shorter than my previous posts, but will hopefully still be as useful. And they will be all about getting back to basics. Knowing all you can about the easy stuff in Excel so you can practise it, make it perfect, then not even think about it while you use the easy stuff to do the hard stuff.
As always, if there is any little (or big) issue in Excel you would like me to address, please feel free to leave a comment or send an email through this link.
In the first few blogs in the "Back to Basics" series, we are going to get to know the menu ribbon. I will randomly select different icons off the ribbon and tell you what they do. You should hopefully learn something interesting each time.
Our first icon looks very unassuming and innocent but is probably one of the most powerful icons on the ribbon. It's this one:
Yup - that tiny little arrow you may have thought was just window dressing, actually allows you to add any tool you want to your Quick Access Toolbar, which is the top line of icons above the menu bar. Why this is handy is that you can add any tools you use frequently to the Quick Access Toolbar, and then you don't need to scroll though your menus to find them.
You can also add tools that aren't necessarily available on your menu. By clicking on the icon circled above, you can select the option More Commands... and you will get this:
Choose the type of commands you want to look through from the dropdown selection at the top left hand side, click on your selected tool icon on the left, click Add, Ok, and you're done.
You might notice this little icon I have added to my own Quick Access Toolbar:
This little gem is a wonderful time saver. Click on this, and it will open a list of your recent workbooks and places, making finding files you have been working on a lot easier. It also allows you to "pin" a workbook so that workbook always appears at the top of your list. Even if you haven't opened it in months. Just click on the little picture of the thumbtack to the right of the workbook name, and you're sorted.
How to add it is simple. Once your have your "Customize your Quick Access Toolbar" Menu open, select All Commands from the drop down list, and then go to the command "Open Recent Files" (the commands are listed alphabetically), and add it.
So, there you go. Short and sweet, and 2 little handy tips to brighten your day!
Have a great one!


